Did you know your keyboard can have 7,500 bacteria per square inch? That’s 400 times more germs than a toilet seat. Most people spend 2-3 hours daily typing, which leads to crumbs and oils building up fast. This can make keys sticky or even cause malfunctions.
Quick keyboard cleaning isn’t just about staying clean. It also keeps your device running smoothly. Cleaning your keyboard regularly takes only 10-15 minutes. Using isopropyl alcohol can cut bacteria by 99%.
But, over 80% of users ignore this simple step. This risks both their health and their device’s performance. Let’s explore some easy keyboard cleaning tips to make your workspace safer and your typing faster.
Why You Should Clean Your Keyboard Regularly
Did you know your keyboard can have up to 20,000 germs per square inch? That’s 400 times more than a toilet seat. Keyboard bacteria live in the spaces between keys, spreading germs that cause illnesses. A study found 75% of office workers don’t clean their keyboards regularly, putting their health at risk.
Touching contaminated surfaces can make 80% of people sick each year. Cleaning your keyboard can help lower this risk.

Dirty keyboards also wear out faster. Dust and crumbs can jam keys, causing 70% of keyboard problems. Cleaning your keyboard regularly can make it last twice as long.
Also, 94% of workers feel more focused in clean spaces. A clean keyboard can improve your productivity and accuracy.
Health experts say you should sanitize your keyboard every month. Mechanical keyboards with removable keys can be 90% germ-free when cleaned right. A quick wipe or compressed air blast can keep your device and workspace healthy.
Protect your health and your keyboard. Cleaning takes just minutes but saves you from days of being sick and expensive repairs.
Tools You Will Need for Fast Cleaning
Start with the right keyboard cleaning supplies. You’ll need microfiber cloths, cotton swabs, and compressed air keyboard cleaning cans. For sanitizing, use isopropyl alcohol keyboard cleaning at 70-90% concentration.
A 70% solution is best—it dries slower, killing germs without warping plastic. Everyday grime can be cleaned with disinfecting wipes or gentle dish soap and water. These basics quickly remove crumbs, dust, and oils.
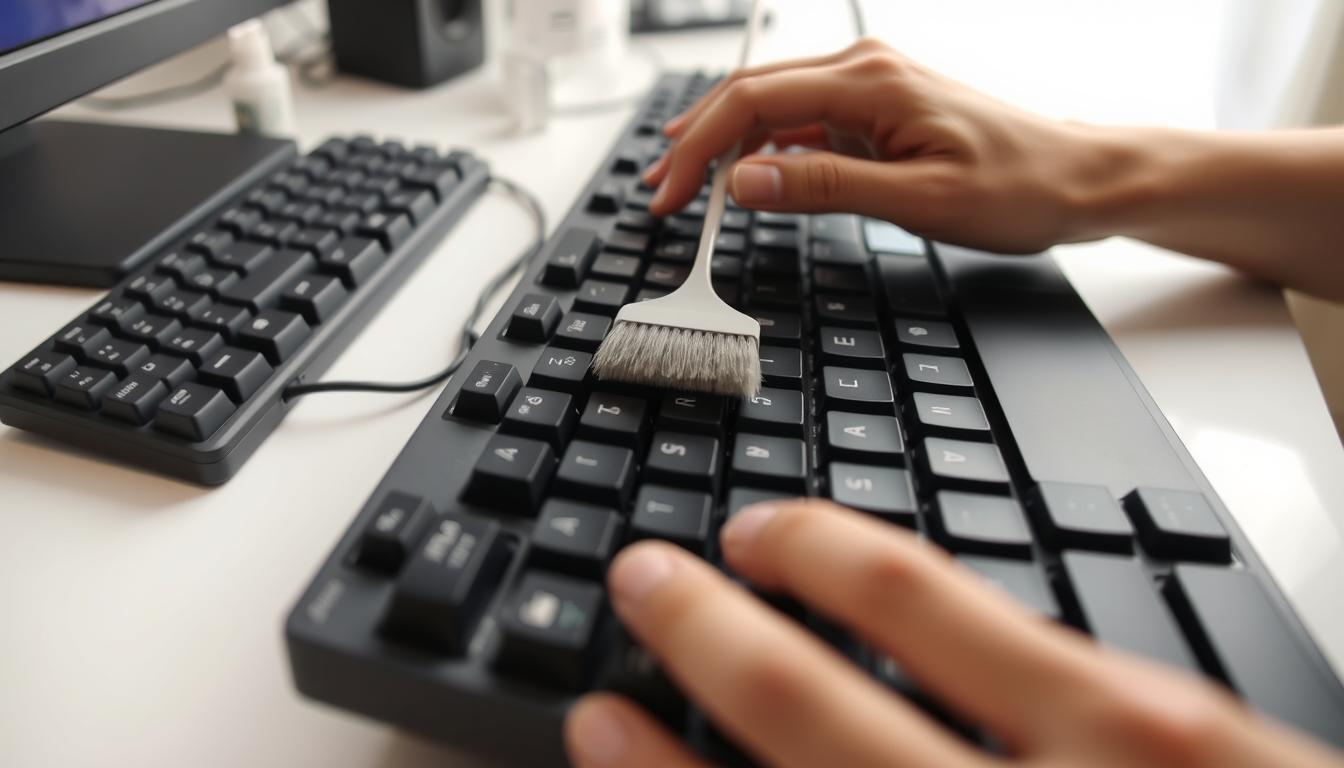
For deeper cleaning, add a keycap puller (often included with mechanical keyboards) and a soft-bristle brush. A small vacuum with a crevice tool sucks out trapped debris. Avoid abrasive sponges—they scratch surfaces.
Some brands like Kensington or Fellowes offer pre-packaged keyboard cleaning supplies kits with all essentials. For tough stains, specialized gels like KeySplurge’s Cleaning Gel lift stubborn residue without soaking.
Create a dedicated cleaning spot. Store tools in a small container so they’re ready for weekly dust-offs or monthly deep cleans. Always unplug the keyboard first and avoid spraying liquids directly. Let everything dry overnight before reassembling. Proper tools and prep keep your keyboard responsive and extend its lifespan.
Preparing Your Keyboard for Cleaning
Before you start cleaning, it’s important to prepare your keyboard. The first thing to do is unplugging keyboard before cleaning. For wired keyboards, just disconnect them. If you have a wireless keyboard, make sure to turn it off.
Laptops need extra care. Make sure to shut down the laptop and unplug the charger. This step helps avoid electrical shorts and damage.

If your keyboard has removable keycaps, take a photo of their layout. Clear your workspace to avoid any mess. Gently tapping the keyboard upside-down helps remove loose crumbs and dust.
For laptop keyboard cleaning, use soft brushes to sweep crumbs from the edges. Avoid using harsh tools near delicate parts.
Remember, moisture is a big risk. Always wipe surfaces with a dry cloth first. If you need to remove stubborn debris, a soft brush is better than compressed air. Always let everything dry completely before putting it back together.
These steps only take a few minutes but can save you from costly mistakes. Proper preparation keeps your keyboard working well and lasts longer. Are you ready? Let’s move on to the next step and make your keyboard happy!
Fast Cleaning Techniques for Different Types of Keyboards
Not all keyboards are the same. Mechanical keyboards do well with a quick clean using compressed air. A 5-minute clean with alcohol-dampened cloths also works great.
When spraying, angle it to avoid pushing debris deeper. Most dirt comes off with a cotton swab and patience. You only need to remove keys if crumbs are stuck.

Laptop and membrane keyboards need extra care. Clean them with a cloth dampened in isopropyl alcohol. Tech experts say 90% of them recommend this method.
Don’t let liquid get into internal gaps. Use a toothpick wrapped in tape to get crumbs out of tight spots. If your laptop keys can be removed, gently pop them off for a deeper clean. But always check the manufacturer’s guidelines first.
Quick cleaning doesn’t mean you should skip safety. Hold canned air cans upright to avoid condensation. For sticky keys, a microfiber cloth with 70% isopropyl alcohol works well.
Regular clean keyboard without removing keys routines help a lot. They prevent 60% of performance issues caused by debris. Remember, a weekly 5-minute clean keeps your typing area clean and working well.
Step-by-Step Guide to Deep Clean Your Keyboard
For a thorough clean, a deep clean keyboard process is needed. First, unplug your device. Then, get a keyboard cleaner, keycap puller, and soft cloth. If you have a mechanical keyboard, remove keycaps row by row with a puller. This helps avoid misalignment. Take pictures of the layout to help put everything back right.
Membrane keyboards might not need this step. But, they also benefit from a good surface clean.

Use compressed air to clear out dirt from tight spots. Then, use a soft brush to clean exposed areas. Soak removable keycaps in mild soap and water for 10 minutes. But, make sure not to get any liquid on the circuitry.
Let all parts dry completely. Moisture can harm your keyboard’s electronics. For gaming keyboard cleaning, pay extra attention to media keys and RGB parts. These areas get dirty fast from lots of use.
Wipe down with 70% isopropyl alcohol on a cloth. But, don’t spray it directly. When putting keys back, do it slowly and carefully. Make sure switches are in the right place.
Gaming keyboards have big keycaps that catch crumbs. Clean these often to avoid sticky keys. After cleaning, test each key to make sure they work right. A deep clean keyboard routine keeps your keyboard working well and germ-free. Do this every 3-6 months for the best results.
Special Care for Sticky Keys
Sticky keys can really mess up your work. But, most problems are simple to fix. Look for spills, crumbs, or oils under the keys. Clean sticky keyboard keys right away to stop sugar or dried stuff from sticking.
For tough spots, use a cotton swab with isopropyl alcohol. Gently rub around the key stem. Then, turn the keyboard upside-down and tap it to get rid of dirt.
When a keyboard key stuck won’t move, try this: Gently rock the key while lifting it. Don’t push too hard, or you might bend the clips. If it’s sticky from silicone spray, clean it with a dry cloth first.
Don’t spray liquids on your keyboard. For dust, use compressed air to clean between the keys.
Keeping your keyboard clean is key to avoiding damage. Clean keys with a microfiber cloth every week. If keys are unresponsive, soak them in soapy water for 10 minutes. Then, rinse and dry them before putting them back.
For fix unresponsive keyboard keys on MacBooks, use tools approved by Apple. This way, you won’t damage the keyboard. If a key breaks or warps, replace it.
Sticky keys usually aren’t a sign of serious damage. Most problems can be fixed with patience and the right tools. After cleaning, test each key to make sure they work smoothly. If issues keep happening, you might need to replace the keyboard. Keep your workspace clean to avoid sticky keys in the first place!
Best Practices for Daily Keyboard Maintenance
Small habits can make a big difference in keyboard maintenance. Start by shaking your keyboard upside down daily to get rid of crumbs. A quick swipe with a microfiber cloth keeps it clean. For messy workspaces, a keyboard cover can block spills and dirt.
These simple steps make clean keyboard daily routines easy. They help prevent debris buildup.
Weekly deep cleans with canned air or disinfecting wipes tackle hidden grime. Spend just 5 minutes a week on this. It keeps your keyboard clean without feeling like a chore.
Set phone reminders to stay on track. Over 70% of workers eat at their desks, so using placemats can block crumbs. Regular care slashes bacteria by 99%, keeping you healthier and devices working smoothly.
Proper keyboard maintenance can extend its lifespan up to 10 years. Skipping care can lead to 40% more malfunctions and germ exposure 40x higher than toilet seats. Small steps like wiping keys or using covers save time long-term. Prioritize these habits for a hygienic and efficient workspace.
Signs It’s Time to Replace Your Keyboard
Even with regular wireless keyboard cleaning, some issues signal it’s time to move on. Persistent key sticking, cracked keycaps, or unresponsive buttons after multiple cleanings are red flags. If your keyboard is over five years old, its keyboard lifespan may be nearing its end.
Mechanical keyboards, built to last 50 million keystrokes, often outlive standard models by years. But if typing feels sluggish or keys won’t register, it’s likely past time for a refresh.
Data shows 70% of office workers replace keyboards every 2-3 years due to wear. If your device shows 3+ unfixable keys or visible corrosion, it’s time to act. Frequent double-pressing or erratic cursor movement also hint at deeper issues.
Gamers often upgrade annually to maintain performance, but for most users, replacement becomes critical after 5+ years of daily use.
“A keyboard’s keyboard lifespan depends on usage and care. When cleaning no longer helps, it’s smarter to invest in a new one than risk productivity loss.” – Industry Keyboard Maintenance Report 2023
Consider ergonomic needs too. If your old model causes discomfort, upgrading to an ergonomic design could boost comfort and efficiency. Always recycle old keyboards responsibly—many brands like Logitech or Microsoft offer recycling programs.
When choosing a replacement, check if your model’s keyboard lifespan aligns with your budget and usage. Prioritizing timely replacement avoids long-term strain on wrists and fingers, ensuring smoother workflows.
Conclusion: Enjoy a Clean Workspace
Keeping your keyboard clean is more than just making it look good. It’s a simple habit that brings big benefits. A clean keyboard helps you type faster and more accurately. It also keeps germs away and boosts your productivity.
Regular cleaning can make you feel more focused and energized. It’s like a mental refresh to start your day. Studies show that cleaner spaces can even help you feel better and avoid getting sick.
How often you should clean your keyboard depends on how much you use it. Try to deep clean it every few months with compressed air and disinfectant wipes. Don’t forget to do a quick wipe every week.
This routine can make your keyboard last longer. Even the cheapest keyboards can last for years if you take care of them. But, if you ignore cleaning, you might end up with sticky keys or other problems.
Starting small can make a big difference. Clean your keys every day, remove any debris weekly, and follow the guide for deep cleaning. A clean keyboard can make you more focused, reduce germs, and make you proud of your workspace.
So, grab that can of compressed air or a soft cloth and get started. Your desk and your health will appreciate it. Every time you clean your keyboard, you’re making your workday better.